Autodesk Smoke tips & tricks - FX Filter (Part I)
Ever wonder what this Fx Filter is doing ? If you are maths genius, you might able to come out with something genius.
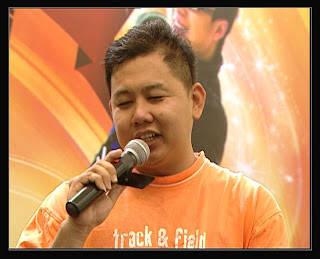
Here's the picture of a superstar before apply any magic filter numbers.
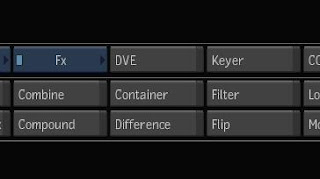
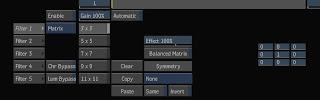
Go in the filter, and lets start with 3x3, you need to turn on the 'Enable' button first. Now you got a 3x3 matrix box.
Each pixel of the picture will need to go through this matrix transformation. Note that each pixel has 1 R , 1 G , 1 B (RGB) component. The filter will put each pixel into the hot seat (the middle box), and apply some maths to it. The middle seat is the current pixel, and the other 8 boxes around is the pixel around the current pixel.
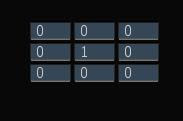
Now, look at the above matrix box, the middle seat is 1, and the surronding boxes is zero. This mean no transformation. Say if the current pixel RGB value is 100,150,200, this mean :
R100 * 1 = 100, G150 * 1 = 150, B200 * 1 = 200
This matrix formula will apply to every pixel. So, nothing is changed, no transformation.
Now if you change the 1 to 2 in the middle seat, this mean double up the value.
R100 * 2 = 200, G150 * 2 = 300, B200 *2 = 400

If you replace the middle sit number to 0.5, it will be darker then.
R100 * 0.5 = 50, so get the idea?
Now look at the below matrix, can you guess what it does ?
 Say, if the hot sit pixel (current pixel) is R100, G150, B200. And the pixel just above the current pixel is R10, G20, B30. This matrix mean:
R100 * 0, G150 * 0, B200 * 0, RGB =0 : no value is taken from current pixel, but it borrow the value from the above pixel. R10*1, G20*1, B30*1 = RGB10,20,30. So the final output will be the same picture but move down 1 pixel compare to the original picture.
Say, now you give the hot sit (middle box) value 0.5
R100*0.5, G150*0.5, B200 *0.5 = RGB50,75,100 and plus the value borrow from box above:
RGB50,75,100 + RGB10,20,30 = RGB60,95,130. Get the idea ?
The whole image will be a bit blur because it has been mixed with pixel above.
Now look at this, do you know what will it does to the picture? This matrix, only take 20% from the original pixel, and it borrow 10% from each pixel around it. The final picture will be a bit blur because the pixel has been mixed with pixel around it. This is an example of Box Blur Effect. Of course, you can modify around, change the numbers, say borrow 10% from top 3 boxes, 5% from bottom 3 boxes, and 20% from left and right, and you created your own blur formula.
If you have understand this basic, we will go a bit further next time on this matrix.
Autodesk Smoke Tips & Tricks, http://mysmoke.blogspot.com/

 Set the 3 layers blend mode to 'Simple ADD'. The picture now should look the same as the original, nothing special.
 You can also blur the individual layer with different values to create old film look or soft look, or color spread out.
 With individual channel separated at their own layer, you have more option to play around.


 Using the same techniques, you can add multiple borders with different color or fill, even different wipe pattern, just add more layers and delay each layer a bit to the right.
  One easy way to deal with this is, Deinterlace you chromakey footage first, then do your key. Remember to Deinterlace your background clip and other layers as well. If the other sources is progressive, just repeat each frame to 2 frames. After the compositing done, Interlace it back to normal.


 I splice out the portion that need re-edit.
 Then go into the history to re-edit, but the history will still render to the original end point, not the new end point. If this is a very complex composite, it will waste a lot of your time to render thing that you don't need render.
 Worst, you can't stop halfway. If you want to go out of history to do other thing, you have to render the whole thing or exit with 'Cancel', and every change you make so far gone.
 The better way is, after recall the history, save Multitrack, then exit with 'Cancel'
 Then, enter empty DVE (Alt click DVE), and load multitrack, and you won't have the problem of missing media. Now you can set your new duration. When you want to start render, just part you playhead at where you want it to start render (The new inpoint).


 Then in color correction DVE, just use the color wheel to change color. A neutral gray is RGB100,100,100 or for 10bit RGB401,401,401.


 Say, you graphic will start with small, then zoom into the guy. Now, the problem comes, because the front source is calculated first (you shrink the picture), you are actually zooming into a small picture source (the one you shrink, not the original one), so the picture became blurred.

 Because the pictures resolution is low here, you won't see much different, but just look at the eyes sharpness, you will see the different.


